Tutorial 1: Setting up a simple keypress experiment
In this tutorial, we'll help you become familiar with some basic SuperPsychToolbox (SPTB) functions that might be handy for use in a simple experiment. We'll try to get you on your feet quickly, and then add some more advanced capabilities. This tutorial assumes only very little familiarity with programming concepts and the Matlab environment - you won't need to be an expert to make it through.
Before you begin the tutorial, make sure your computer has sufficiently recent versions of Matlab, Psychtoolbox, and SuperPsychToolbox installed and configured. Then, open Matlab, type "demoEasyKeys" into the Command Window, and press enter. This will run a short keypress experiment, which will both give you an idea of what you're about to build yourself, as well as confidence that everything is set up correctly.
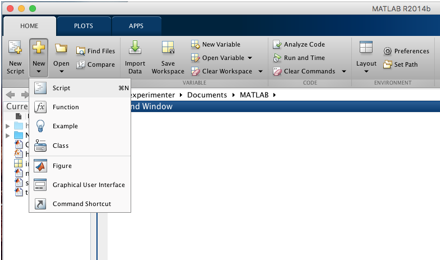
Once you're finished the demo, it's time to get started! Create a new 'Script' file in the editor window, and save it in your MATLAB folder with the filename 'my_first_sptb_experiment' ("Save as..." in the Save drop-down menu in the Matlab toolbar). Your script should save with a '.m' extension.
A. Opening a window with Psychtoolbox
SPTB does not replace Psychtoolbox: it only simplifies your use of Psychtoolbox. So to get started, you're going to need to learn how to do a few Psychtoolbox things. To begin with, we'll need a window to display our experiment in. The code block below defines several variables, such as which monitor to use, which background color to use, and how many pixels to occupy on your screen. We'll keep it small for now so we can see what we're doing in the Matlab console at the same time the experiment window is displayed, but we can change this later to make the experiment full-screen.
To create this window, add the following, or something like it, to your experiment file.
target_monitor = 0; % shows the front buffer of your main screen
bg_color = 0; % sets the background color of the screen to black
screen_size = [0 0 600 400]; % a 1x4 matrix containing the coordinates of
the screen size
window_pointer = Screen('OpenWindow',target_monitor, bg_color, screen_size);
Note how each line is terminated by a semi-colon. This marks the end of the statement, and suppresses output to the Command Window. Some of the statements are followed by a '%' symbol. Any text following this symbol is a comment, and is not interpreted as a command.
Your screen should look something like this:

What you've just done is write some instructions into a script, which is a file containing Matlab commands that you can run over and over again. In this tutorial, we'll describe code that you can include in your script, and then at the end of each section, we'll get you to run the script to see what happens.
Let's try this now. Save the changes you've made to your script so far (File menu). Next, in the Matlab toolbar, you should see a "play" button with the word "Run" beneath it. Click this button now. If all went well, you should have created a blank window! It may have displayed some initialization text by Psychtoolbox.

We don't need the window right now, so type 'sca' into the Command Window and press enter to close it.
Others have written more detailed tutorials about working with Psychtoolbox windows and pointers. If you're interested, please review this tutorial and/or the Psychtoolbox documentation. However, for present purposes, the above is all you really need to know.
B. Creating a bare-bones multiple-choice experiment
Preparing basic experiment information
Now that we can open a window, we can use SPTB to display a question and capture the response. We'll do this using the SPTB keypress input module, "easyKeys". We can either draw the screen ourselves, or let easyKeys handle it for us. For now, we'll let easyKeys do the work.
To use easyKeys, we have to initialize a datastruct. A datastruct is a place where SPTB keeps track of all sorts of information relevant to your experiment, including your participant's keypress responses. It is implemented as a "struct" variable in Matlab.
Before we initialize anything, however, we need to prepare some basic information about our experiment. For starters, we will name our experiment and our participant. This is needed so that we can better organize the files it will write. Your participant name will normally be an alphanumeric code rather than their real name, but for now we'll go with "Test Participant".
To create our variables, we will store some text inside Matlab variables. We can assign material to a Matlab variable by using an equals sign. Text in Matlab is referred to as a string, short for a "string of letters". To define a string, we need to enclose our text inside single quotes. This way, Matlab will know we're referring to text, rather than some command or a variable that it can't find.
test_name = 'easyKeys Tutorial';
ppt_name = 'Test Participant';
To gather data, we also need a question to ask our participant. We'll define this as a string as well.
question = 'How is your day going?';
Finally, we will define the amount of time in seconds that the participant has to respond. Ten seconds should be enough for this challenging question. Note that no quotes go around the number 10, because we are supplying a value rather than a text string.
duration = 10;
Response devices
To run, your experiment needs to know where it should be listening for keypresses. By default, SPTB uses some simple logic to try and guess what device makes sense for you to use, and under most simple setups, this works without any fuss. However, under some more complex arrangements (e.g., with multiple keyboards, special devices, etc.) you may need to explicitly tell SPTB where to get keypress information.
To be on the safe side, we'll pick a device manually for our bare-bones experiment. Start by typing the following command into your Command Window:
>> getInputDevice
You should see a list of devices that looks something like this (featuring your own devices):

All we need for now is the name of the device we want to use for our experiment. Simply copy the string for your keyboard into your own my_keyboard variable (don't just copy the below, since the output will be unique to your own setup).
my_keyboard = 'Apple Keyboard';
That's all we'll need from this for now, but note that getInputDevice has some advanced device-finding features for more challenging situations that you may find worthwhile reading about later.
Preparing response keys
SPTB features response map objects that describe what keys the participant is allowed to press, what is the meaning of pressing each key, and what value goes with each key, if applicable. This map is an important building block for running your experiment and interpreting your data. Years later, looking back at your dataset, you will be happy to know what was meant by the participant pressing 'W'.
To make a response map, we will need to decide both which keys the participant is supposed to press, and what pressing each key would mean. This will require two collections of strings – in Matlab, we gather such collections inside a cell array. This is simple to add to our program. We simply surround our collection of strings with curly brackets, and place a comma between each one of them.
allowed_keys = {'1','2','3','4','5'};
key_labels = {'quite bad actually', 'not very good', 'so-so', 'fairly good', 'just marvelous'};
Now that we have our cell arrays, we will call the function makeMap to create a response map. It will fuse your information into a handy table that maps the key labels, or descriptors, onto the key inputs and associated key values.
respmap = makeMap(key_labels, [ ], allowed_keys);
If you type respmap into your console, you will see how this information is now helpfully organized for later use.
You'll note that makeMap filled in some arbitrary key values for us. We could have assigned our own values for each key if we had wanted. You'll also notice that we inserted some mystery square brackets in the middle of our makeMap command above. These square brackets with nothing between them indicate an empty array; that is, we are telling makeMap that we are not interested in supplying that particular information. If we wanted, we could have set some values inside those brackets (e.g., [-2, -1, 0, 1, 2]).
We also need to define which responses we consider as "correct". There isn't really a "correct answer" to our question, but let's imagine that our experiment required the participant to be in good spirits. To this end, we'll define a variable as follows:
correct_resp = {'so-so', 'fairly good', 'just marvelous'};
We could alternately have used the key names to define what is correct and set the cell array to be {'3','4','5'}. We usually prefer to use key labels rather than keys, however, as it's easier to understand what is going on in the code, and avoid mistakes.
Initializing the datastruct
Now that we have the bare necessities, we will create our easyKeys datastruct. Every input function in SPTB has a corresponding initialization function - in the case of easyKeys, it is called initEasyKeys. We use initialization to set properties of our experiment that are going to stay the same across questions.
Our call to initEasyKeys below contains required pieces of information in the first two positions: test name, followed by participant name. After that, all of the information we will give it is made up of "parameter-value pairs". That is, we tell initEasyKeys what we are about to give it, then give it. In particular, we will tell it about our respmap, question duration, and the window we created. We'll also tell it how we want our options to be drawn. In this case, we'll choose "tall" so that we are presented with a list of options, one per line.
The code we use below to call initEasyKeys is broken across multiple lines to make it easier to read. We can do this by placing '…' at the end of each line, to communicate that the command is not done yet.
easyKeysData = initEasyKeys(test_name, ppt_name, ...
'default_respmap', respmap, ...
'default_cresp', correct_resp, ...
'prompt_dur', duration, ...
'parent', window_pointer, ...
'draw_func', 'tall', ...
'device', my_keyboard);
What this command did was initialize a datastruct and store it in the variable named "easyKeysData". We now have a datastruct that we can use in our experiment to store participant responses. This may seem like a lot of prep work before we can get down to business, but it will pay off later by making it easy to deploy our question.
You might ask, "How was I supposed to know about all of that formatting and all of those parameter names"? The answer is, you weren't! Once you know the name of the function you want to use, you can simply type "help" followed by the function name. For example, "help initEasyKeys" will produce extensive documentation about the syntax you need. It also discusses all the ways you can use the function, along with all of the features you can set using parameter-value pairs. If you find it more convenient, you can also find this information in our online API.
Gathering keypress data
We pass this datastruct, along with our question, into easyKeys to collect a response from our participant. This is the "money" command that tells Matlab to gather keypress input using the settings you prepared earlier for this question type.
easyKeysData = easyKeys(easyKeysData, 'stim', question);
When you call this function, the participant's response is logged and stored in your datastruct, easyKeysData. By default, the response is also logged to your hard drive right away – whether your experiment crashes or the power goes out, your experimental data are safe and can be recovered later. We'll talk more about your data files later.
Cleaning up
After we gather your question, there will no longer be any need for the window. To remove it, add the following line to the bottom of your script:
sca
That's it – you've coded a simple experiment! Save your script file, and run it in the same way you did before. You should see a window appear with your test question and the response options you defined; after ten seconds, your window should disappear. You may have also seen a lot of output to the Command Window, which will include raw data, screen synchronization and all manner of other things - we'll come back to this output later, so you can safely ignore it for now.

C. Adding an introduction message and closing message
While we were able to easily run our first experiment using just a call to easyKeys, we often want to signify a more official start and end to our experiment. By passing our datastruct into SPTB's startSession function before our call to easyKeys, we can suppress user input, set our experimental onset time, and let the recoveryManager know that our datastruct is being used in the event of a crash. Additionally, startSession has a parameter-value pair which allows us to easily display a set of instructions before the experiment begins.
Let's see this in action by calling startSession with an 'instruct' parameter-value pair. Simply define a string containing your instructions, and pass it to startSession following the 'instruct' parameter. Calling startSession will return your datastruct back, so be sure to 'catch' it in your datastruct variable, easyKeysData. Place this code after you've initialized the datastruct with initEasyKeys, and before you call easyKeys to gather responses.
instructions = 'In this experiment, you will be presented with a multiple choice question. You will have 10 seconds to press the key corresponding to your answer.';
easyKeysData = startSession({easyKeysData}, 'instruct', instructions);
Now when you run your experiment, you will not see your keypresses showing up in your Editor or Command Window, since the user input is suppressed. No more mysterious strings of garble hiding in your experiment file!
After we have started the experiment session and collected a participant's response, we need to tidy up. We will call endSession to restore user input, write the experiment end time to disk, and let the recoveryManager know that we are done writing to our datastruct. In addition, we can specify a closing message by using a parameter-value pair in endSession.
Try defining your closing message as a string, and passing it to endSession following the 'message' parameter. Make sure to catch your datastruct!
Click here to view answer
closingMessage = 'Multiple-choice section complete!';
easyKeysData = endSession({easyKeysData},'message', closingMessage);
Now you've coded a simple experiment that is safe from crashes! Try tutorial 2 to add some more features to your experiment.